Thursday, July 30, 2009

My Prayer Basket

Yeah! I finished weaving the "Prayer Basket" I've been working on just in time for our Parham Family Reunion this weekend. This is a good thing, because my basket is my contribution to our reunion auction! My friend Nancy at Basketmaster's Weavings and I attempted to weave this little beauty without a pattern. Good thing she's a "master", because there is no way I could have tackled this project on my own... Not even with a pattern!

If you haven't figured it out yet, this basket was actually created as a peanut basket. Nancy came up with they "Prayer Basket" concept, hence the "To be Prayed" on one side and "Prayed" on the other. I printed out some sweet little affirmations and included in the "To Be" side of the basket, as well as adding some blank circles so the auction winner would be able to add some prayers of his/her own.

If you want your own set of the affirmation cards, the wonderful ladies over at Kind over Matter have free, printable versions available for you to download. They've even included a cute little box pattern so you have a place to store your cards. My thanks go out to Amanda, Jenn, and their blog collaborators for offering us such a beautiful gift!

OK. We're off the the reunion in the morning. Yes, I'm cooking for a crowd. Yes, I'll be posting recipes. And, YES, chocolate will be involved :-)

Hugs and blessings~
~~~Anne

Saturday, July 18, 2009

Six Word Saturday - Soap!

"Six Word Saturday"
TODAY I'LL CRAFT. I'LL CLEAN TOMORROW!

Woo hoo! My Bramble Berry order came in this week. Christmas in July, I'll tell ya! Anyway, I have been chomping at the bit to make Fortune Cookie Soaps for a while now, as well as some rose petal bath bombs. Even though my mother-in-law and sister-in-law are coming to visit this week, I'm going to dedicate this afternoon and evening to doing my soapy projects and might even finish weaving my "Prayer Basket". Cleaning can just wait until tomorrow :-)

Please come back next week to see the results of my crafty efforts. There just might there be a couple of tutorials for you.

By the way... If you want to participate in "Six Word Saturday", please visit Cate for more information. (Just do it. You know you want to play!)

Hugs and blessings~

~~~Anne


Thursday, July 16, 2009

What I've Learned...

Words of Wisdom from Maya Angelou~

  • I've learned that no matter what happens, or how bad it seems today, life does go on, and it will be better tomorrow.
  • I've learned that you can tell a lot about a person by the way he/she handles these three things: a rainy day, lost luggage, and tangled Christmas tree lights.
  • I've learned that regardless of your relationship with your parents, you'll miss them when they're gone from your life.
  • I've learned that making a "living" is not the same thing as "making a life."
  • I've learned that life sometimes gives you a second chance.
  • I've learned that you shouldn't go through life with a catcher's mitt on both hands; you need to be able to throw some things back.
  • I've learned that whenever I decide something with an open heart, I usually make the right decision.
  • I've learned that even when I have pains, I don't have to be one.
  • I've learned that every day you should reach out and touch someone. People love a warm hug, or just a friendly pat on the back.
  • I've learned that I still have a lot to learn.
  • I’ve learned that people will forget what you said, people will forget what you did, but people will never forget how you made them feel.

What have you learned?

Hugs and blessings~

~~~Anne

Wednesday, July 15, 2009

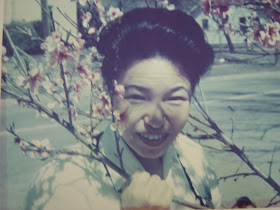
Happy Birthday, Mom.

Mitsue (Murayama) Porter
July 15, 1930 - August 9, 1989

Friday, July 10, 2009

How to Make Origami Paper Dolls - Version One

Aren't these little origami dolls sweet? Want to make some of your own? Follow my step-by-step tutorial and you'll soon have a whole collection of kimono dolls to decorate a scrapbook page, make a pretty greeting card, or attach to a gift package. Have fun!

A couple of things before we begin:
I used "washi" (Japanese paper made of fiber so it has more of a cloth-like texture) for the boy doll. I used a paper pattern I got from Creative Park for the girl doll. I simply printed the pattern on plain old printer paper and cut it to size. It worked great, but if you have access to washi, I would certainly reccommend using it.

An important Japanese cultural note: Please fold the Kimono layers as shown (left side first, then right side). Right side first is funeral attire.

Kneeling Origami Kimono Doll
Assemble your materials:
You will need:
black crepe paper for hair - 1 piece cm x 2.5 cm and 1 piece 4 cm x 3.5 cm
white cardstock for head - a circle about 2.5 cm across (the size of a quarter)
white cardstock for neck - a rectangle about 1/2 cm x 5 cm
paper for collar - three 5 cm x 5 cm squares
paper for kimono - one 10 cm x 10 cm square
paper for underskirt - one 5cm x 5 cm square
Glue
'
Step One: Assemble the neck and collar:
1. Fold the three squares in half, into a triangle. Put a tiny bit of glue down the center of two triangles.
2. Layer the triangles as shown above.
3. Flip the layered triangle stack over and glue neck to the center.
4. Begin folding the top left flap across the neck at the angle shown. Repeat with the right side.
5. Repeat until all layers have been folded. You may use a tiny drop of glue to secure your collar layers, if you prefer.
'
Step Two: Make the Kimono
1. Fold your 10 x 10 square in half, making a triangle. Fold the top left corner in to meet the center of the right side of the triangle.
2. Repeat with top right corner.
3. Unfold your triangle and position your neck/collar piece. Refold your kimono and adjust the collar as necessary. Secure neck using a tiny drop of glue.
4. Fold bottom flaps up and crease. Unfold and tuck into the "pocket" made by the top kimono layer.
'
Step Three: Assemble the underskirt:
1. Fold 5cm x 5cm square into a triangle. Unfold back to square and fold top corner down to center. Unfold to square. Fold bottom corner up to the crease you just made, and fold corners in, as shown above.
2. Fold both bottom corners in and secure with tiny drops of glue.
3. Slide underskirt into kimono pocket, leaving about 1cm showing at the bottom of the kimono.
'
Step Four: Create your hairstyle
1. Place cardboard circle on top of 4cm x 3.5cm square, as shown.
2. Wrap hair around circle and secure with tiny drops of glue at the "temples".
3. Flip hair back as shown in picture above.
4. Glue on bangs (the smaller of the crepe paper rectangles.
5. Fold bangs over back of head and glue into place.
Final Step:
Position head on neck, trimming neck if necessary. Glue into place... You've now created your first Origami Kimono Doll! You can use your creativity in making different hairstyles for your dolls, using shorter hair for boys, adding hair ornaments or bows, or even embellishing your dolls with glitter or ribbon. I kept my doll "as is" and attached her to a plain brown greeting card with one tiny dragonfly floating above her. I think the simplicity of this is beautiful.
'
Please come back next week for the next version of my origami kimono dolls. Until then...
'
Hugs and blessings~
~~~Anne

Thursday, July 9, 2009

Origami Dolls "Sneak Peak"

See... I really am working on them! Today I wrote up the directions to fold the boy doll shown above. I'll have the tutorial posted tomorrow. Pinky swear!

Hugs and blessings~
~~~Anne

Tuesday, July 7, 2009

Flying Pig Soap Mold

Are you kidding me??? I just popped over the the "new and improved" Brambleberry Soap Making Supplies site and found a flying pig soap mold! I am totally placing an order today, because I MUST have this mold. Since I can't stop at just the mold, I'll also be ordering the supplies to make Sushi Soap , which uses a wasabi fragrance. How fun is that?
and Fortune Cookie Soap. Hmm... Writing up some witty (read: "inapproriate") fortunes is going to be a hoot!
Click on the links to find these tutorials (and many, many others) from Anne Marie over at Soap Queen then order your supplies from Brambleberry.
'
I think my stars were aligned, because I picked up some little Chinese take-out boxes, on sale, at Cost Plus last week. They'll be just perfect to hold my little soaps. I can't wait to try these projects and am really excited about hearing about what soap making projects you want to try.
'
Hugs and blessings~
~~~Anne

Monday, July 6, 2009

Origami Project Update

You know how sometimes you get a vision of a project in your head, and you think "Hmm. I know how I want the end result of my project to look, I have the materials I need, and I've done something like it before. This should be simple!" And then, things go shockingly BAD??? Such was the beginning of the origami project I had in mind this weekend.

If you've not figured it out by now, I have decided to make "Warabe Ningyo", which are Japanese origami paper dolls. I remember making boatloads of these dolls with my mother when I was a child, so I thought it would be easy for me to figure out the "how to's". Yeah, right!!! I now have about twenty headless dolls in wrinkled, crooked, ugly kimonos on my kitchen table. I'm far to ashamed to share the pictures with you :-(

BUT... after experiencing a couple of days of trial and error, I think that I'll finally be able to begin posting tutorials for a couple of different style dolls over the next few days. Please remember that making these dolls takes practice, patience, and a sense of humor, but not a lot of skill.

Here are a couple of things I learned while I was experimenting with the doll project:


  • This is not a project that can be done while reclining on the couch watching reruns of "Wife Swap" with a little dog on your lap. Origami must be done at the table!

  • Do not use "real" (translates as "expensive") origami paper for your practice dolls. Simply cut white or colored printing paper to size. It hurts a lot less when you toss your rejects into the recycle bin.

  • Use tiny drops of white glue, applied with a toothpick. Do not use old/super-thick tacky glue applied with a bamboo skewer. (What kind of a slacker would do this? Three guesses.)

  • A 1" circle craft puch would save a lot of time in makng the doll heads. (Note to self: go to the craft store! OK. I don't really need a reminder to go to the craft store...)

If you want to prepare the "ingredients" to make your own Warabe Ningyo so you're ready to follow along when I post the "recipes", here's what you need:


  • black crepe paper for hair (the sheet kind, not streamers)

  • white cardstock - cut out several 1" circle heads. If you don't have a punch, use a quarter to make your pattern

  • origami paper - if you don't have any pretty paper on hand, you can print some cool patterns on plain old printer paper and cut to size. (Yup, I tried it. It works just fine, and the patterns are simply beautiful!) The following sites have amazing selections of free origami patterned paper: Creative Park Chiyogami , The Khans' Origami Paper , and Origami Club .

I hope you're looking forward to making Warabe Ningyo with me. The dolls will make great bookmarks, framed wall art, or as embellishments on note cards or scrapbook pages.


Hugs and blessings~


~~~Anne


Saturday, July 4, 2009

Six Word Saturday - Origami!


"BEAUTIFUL ORIGAMI PAPER OFFERS CREATIVE POTENTIAL"

I'm hurrying to get all of my work done this morning so I can work on a long overdue craft project. Come back tomorrow... I should have pictures and a tutorial on a fun origami project!

I'm really enjoying the "Six Word Saturday" concept. If you'd like to play along, please visit Cate at showmyface.com for more details.

Wishing you all a happy and safe holiday weekend!

Hugs and blessings~

~~~Anne